


I am really excited to share with you this next guest post. It's from my super, crazy, talented friend Meags. I love to get together with her and hang out, be creative and drink hot cocoa into the wee hours of the morning. She's just got this creative streak this one and there's probably not a whole lot she can't do. When she told me she had a guest post for me I was excited. Now this is something I'm going to have to try for Buddy Boys, he would love this.
Hi! My name is Meaghan and I live over at http://meaghanmakes.blogspot.com/, but I'm happy to be visiting my dear friend Nancy's blog!
For Christmas I got the idea to make Pocket Pillowcases for all my nieces and nephews. They were fairly inexpensive to make (if you can get a deal on your fabric) and I think they're pretty fun. OK, so lets get started, shall we? All you need is roughly 1 meter of fabric and some corresponding thread.
 I measured from an old pillow case I had. Leaving room for a 1 inch seam allowance and a 4 inch hem, I figured 25 inches should be long enough.
 Now you have two pieces. One side is obviously for the pillowcase and the rest will be for the pockets.
 The width was a bit tight, but I did have a little space along the side of the fabric to leave for a seam allowance. I couldn't afford to buy two meters of this awesome Cars fabric, but I have a specific nephew who is going to freak out! He's a big Cars enthusiast. This is also the reason the pattern is sideways and not length ways. But I'm OK with it and I don't think my aforementioned nephew will mind.
 Next, cut out two pockets. You can make them any size, but I decided to make one larger and one smaller. The closing flap is the same width of the bottom and you can make it however long you want. Mine is 2 inches and cut at an angle for another 2 inches. the bigger pocket is 8x8.
 And one smaller one is 6x6.
 Your cutting is done! Now let's head on over to the iron. Fold the sides of the pocket, 1/2 inch and fold over again, another 1/2 inch and press. Do the same to the top and bottom.
 Pin your pocket and it should look like this:
 Fold the edges of the top pocket flap the same, 1/2 inch folded over twice. Pin and press.
 Do the same for the other pocket. The two of them will look like this:
 Moving on to the pillow, fold over 1 inch and press.
 Fold over another three inches and press.
 Mosey on over to your sewing machine and zip along the top of your pockets.
 Then sew along the sides and pointed edges of the closing flap.
 Do the same on both pockets, they should look like this:
 I bought these circular velcro sticker things to close the pockets. I would do it differently next time. It was impossible to sew on the sewing machine because of the sticky backing gumming up the needle. But I bought a pack of them, so I decided to use them anyway. Be sure when placing the velcro dots that they are lined up on the top and bottom to close properly.
 I just hand sewed them.
 Pin your pocket to the outside of your pillow. I placed mine lower to the bottom but it's totally up to you where you place it. I also placed mine facing sideways to correspond with the fabric but again it's up to you.
 Sew along the sides and bottom of your pocket, leaving the top edge of the pocket you already finished open.
 Here's the bottom attached.
 Pin the top of the pocket flap above the bottom part of the pocket. Make sure your velcro lines up here as well.
 Sew along the top.
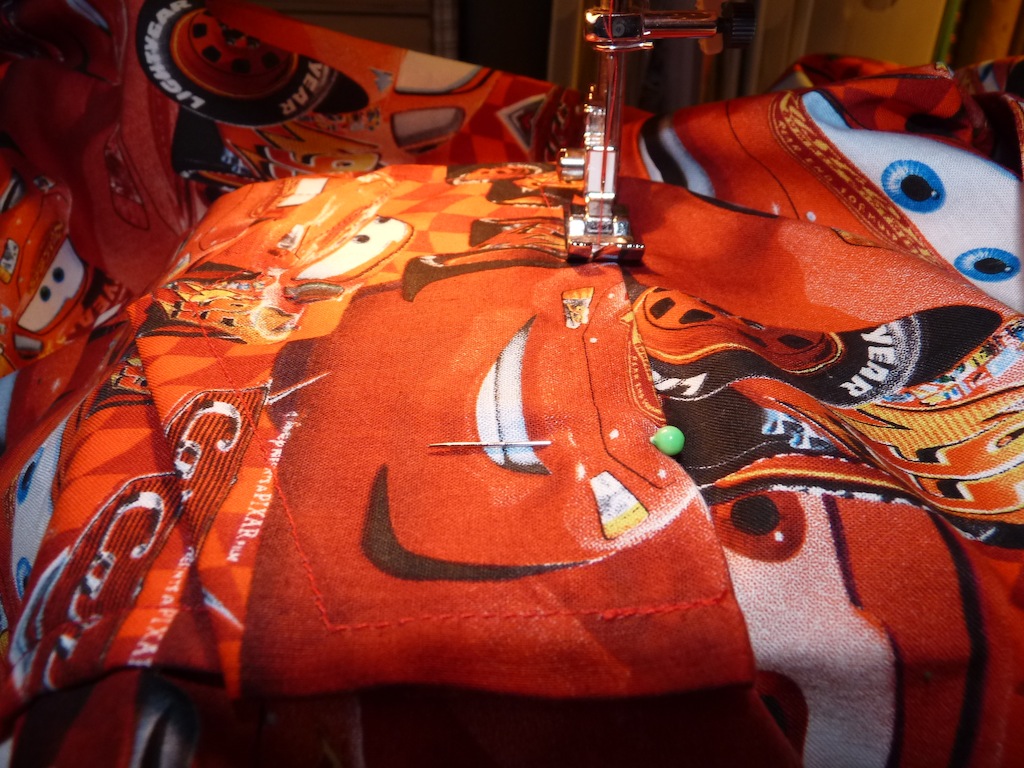 I sewed two lines along the top just to secure it.
 Do the same with your smaller pocket. I decided to place mine on the side close to the hem. This is an extra special pocket that holds extra special stuff...like teeth! Putting the pocket here makes it easier for the Toothfairy to leave stuff in there too!
 Sew the smaller pocket the same way you sewed the larger one.
 Now that your pockets are attached, fold the fabric for the pillowcase in half and pin along the sides and bottom. Sew and turn right side out...
 And here you have it!! Your finished pillowcase!!!
 Have you seen these cute mini books? They're the best size for hiding in the pockets.
 And a loonie fits great in the secret mini inside pocket! Not that I ever got a whole dollar from the tooth fairy. I only ever got 25 cents tops, but inflation and what have you...you know how it is.
  There you have it! A totally simple and comfy Pocket Pillowcase! Thanks for having me on your blog Nancy!
 G'Night!! xo Meaghan
Thanks Meags, This is such a cute idea! And just so you know the toothfairy only gave me 25 cents too! I even think once I got a dime.....seriously!
Wasn't this a fun guest post. Meaghan and I have something fun up our sleeves for the month of December so you'll have to stay tuned. We're going to do the "12 Days of Christmas Crafting" and have some great idea's to share with you. I'm also going to be havnig some giveaways but you have to be a follower of this blog to get in on the fun, so get following!


 Roll out the peanut butter mixture into balls of roughly the same size. Set them on parchment paper, on a cookie sheet. This makes clean up way easier you'll see why soon. Then place them in the fridge for a good hour so they chill and become hard.
 There are two spoons going as you need to roll them to get the excess chocolate to drip off otherwise it will gather around the bottom of the PB ball as it hardens.
 These look really great if you serve them in a
  In case you don't already know her this is Monica, she's the one semi responsible for Christmas baking in Oct and she's also the one who got me into canning my own salsa. That stuff is liquid gold. I can't seem to bring myself to buying the store stuff. I'll show you how to can salsa some other time.


 I stay tuned to Nancy's blog as I have always admired her creative talents. Being a
  We separated the dough into 6 even amounts and then you roll each amount of dough out flat in a rectangle about 12" x 16 "
 Then you carefully roll up the dough into a log shape.
 Signing off from Winnipeg, MB....Lucy (aka Tanya


